There’s something magical about watching the slow-motion world inside a snow globe. Ready to put winter behind us, we decided on glitter as a good ingredient for a springtime version. Here’s how to make your own sparkly happy globe.
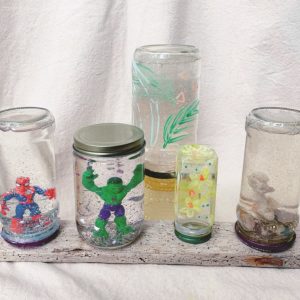
Lizzy’s four-year-old son influenced our design in this case. But after practicing on his superhero globe, Kate searched through a bag full of seashells to make a grownup version she calls an intention globe: shake the globe, take a deep breath, and think about an intention for the day. As you watch the glitter swirl and then rest, let that intention settle in your thoughts.
Whether you’re doing this project at age four or age 64, one bonus comes from sorting through a pile of forgotten treasures. While Lizzy’s son chose a couple of favorites to transform into something special, she discreetly set aside some of the remaining figurines to pass along to others later. The part where you add the glitter is a thrill for globe-makers of all ages.
Our houses are now adorned with a variety of globes. In the future, they may become dust collectors, but right now they are reminders to take a deep breath and enjoy life in our own little confined spaces.

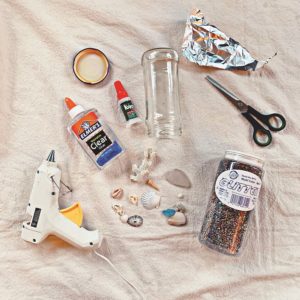
Materials
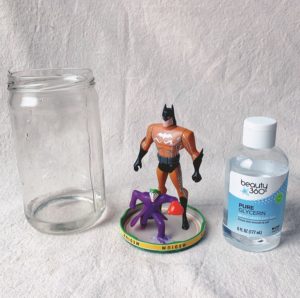
A glass or plastic jar
A figurine, trinket, shell, or crystal
Water-resistant glue, like hot glue or Krazy Glue
Glycerin or clear Elmer’s glue
Glitter
Paint and brushes (optional)
Notes: When choosing your jar, opt for one with a rubber lining on the lid to minimize leakage. Glycerine is available at most pharmacies. It will be what makes the water more viscous and slows down the glitter movement in the jar. If you use clear Elmer’s glue instead, you’ll have more bubbles when you shake the jar.
Make Your Globe
Step 1: Clean jars so they are sparkling. Soak the jar in warm soapy water to ease the label adhesive off.
Step 2: Choose your treasure. Help your child find an appropriate size toy or figurine to feature, or, for an intention jar, look for a shell, stone, or crystal to be the central piece.
Step 3: Glue your figurine or object of intention onto the inside of the lid. Make sure it is centered on the lid and will fit into jar before gluing. To give the figurine more height in the jar, find something that will act as a little stage, like the lid of another smaller jar, and glue this on the inside of the jar lid first. Then glue your treasure to the little stage. Set aside to dry.
If you are going to paint on your jar, now is the time to paint and set aside to dry.

Step 4: Cut tiny pieces of aluminum foil to add more reflective pieces of various sizes to float inside your jar. We colored on foil with sharpies before cutting to add some extra pizzazz. Pinch foil pieces together to add some texture.
Step 5: Pour a small amount of water into the jar. Then stir in a little glycerin or glue. Add some glitter (and foil bits, if using). Give the mixture a swirl to see how freely or quickly the glitter and foil move. If you want slow twirling, add more glycerin. Continue this mixture of water, glycerin, and glitter until you get close to the top of your jar.
(If you do not have glycerin or clear glue, glitter and water will still create a pretty snow globe effect.)

Step 6: Check to see if you have a pile of glitter floating at the top of the jar. If you do, you used too much. Just scoop out the excess before you attach the lid.
Step 7: Slowly submerge your figurine into the water-glycerin mixture and screw the lid on the jar nice and tight. Add a line of glue around the lid for extra leak protection.
Allow to dry.
Step 8: Give your happy globe a shake and watch it sparkle.


