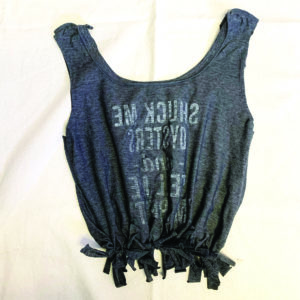
If you have a T-shirt obsession like we do, the truth is you probably have too many of them. They stack up, they multiply, but it’s really hard to let them go. They’re all special, somehow.
Here is a way to give new life to your favorite old designs by turn them into tote bags. They turn out just the right size for carrying a few art supplies, your running shoes, or your lunch.
These totes are easy to make, without any special tools — all you need are scissors and tape. And you don’t have to be especially crafty to create them either. There’s no sewing or knitting involved. You can tie a knot, right? That’s the main technique involved.
Best of all, having lots of recycled T-shirt totes on hand means you’ll use fewer disposal bags, too, and that’s important. Follow the simple directions below and you’ll be ready to hit your local market.
You Will Need:
- Sharp scissors, preferably fabric scissors
- 1 old T-shirt (100-percent cotton is the most sturdy and durable fabric for a tote)
- Tape (not necessary if you are good at eyeballin’ a straight line)
- Lay your shirt flat on the floor and smooth out the wrinkles.
To create your handles, cut off one sleeve, following its crescent shape; cut inside the seam. After you have cut off the first sleeve, fold the tee shirt in half lengthwise and cut off the other sleeve, using the cut line you just made as a guide. That way, your handles will be sure to match.

 2. With the shirt still folded, cut along the neckline to even out the shoulders on both sides. That way your handles will be even.
3. Cut off the bottom edge of the shirt, straight across. Then lay a long piece of tape about 3 to 4 inches above the bottom (cut) edge of the shirt.
Make cuts, about three-quarters of an inch apart, along the bottom of the shirt, like a fringe. These cuts are perpendicular to the bottom edge and should stop at your tape guideline.
Turn the shirt inside out and align the “fringe” pieces on the front and back of the shirt. Match up pieces from the front and the back and tie them together into tight knots, working from one end to the other, all the way across the bo ttom of the shirt.
You will notice that there will be small holes in between these fringe knots.
Working with three tied knots at a time, take one piece of fringe from the middle knot and tie it to the fringe from the knot to its left. Then tie the other piece of middle fringe to a piece of fringe from the knot to its right. Continue this pattern of tying knots along  the whole bottom of the shirt. This step closes up the holes.
Once all the fringe pieces are tied tightly together, you can trim extra fringe length off, but be sure to avoid getting too close to the knot.
(If you like the look of fringe on bottom of your bag, don’t turn your shirt inside out to tie the knots, and don’t trim extra length off.)
- Flip the shirt back right side out and, boom, you have one Tee-rific tote.


